Version Control With GitHub
Version control is extremely important for storing CAD files and software files, and is essential when working on a shared project with other people. The most popular version control system is Git, an open-source project, which is often paired using GitHub, developed by Microsoft, as a remote host.
Installing Git
Section titled “Installing Git”Firstly, we need to check if we have Git installed on our system.
Open the terminal with Ctrl-Alt-t, then run
git -v
# output should be something like:git version x.xx.x
If the output is not what is specified above, install Git with one of the following commands then follow the instructions.
# Ubuntu/Debiansudo apt-get install git
# Fedorasudo dnf install git
Now, you should be able to use Git from any terminal session on your computer.
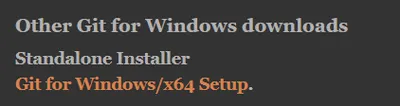
Search in your start menu for Git Bash. If it does not show up, then go to the official site for Git, git-scm.com, and download the standalone installer Git for Windows/x64 Setup.
Launch the installer by double-clicking on it, then agree to the GNU General Public License,and use all the default settings on the installer.
You should be now able to launch Git Bash by searching from the Start Menu on your PC, or from right-click in the file browser, and this is where you will use the Git CLI.
Setting up GitHub
Section titled “Setting up GitHub”If you don’t already have a Github account, create one at github.com. Use your personal email to create this account, NOT a school or organization one.
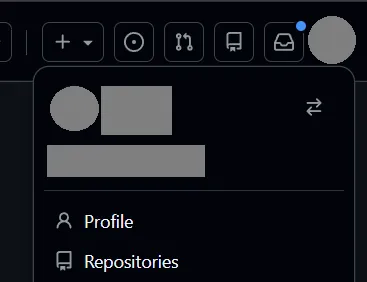
Click on your profile icon in the top right, then click profile
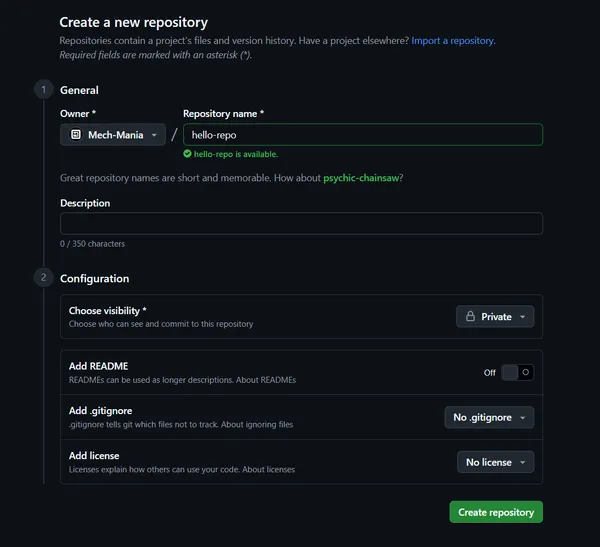
Once inside your personal page, click New Repository. Then enter a name for the repo, and click Create Repository
Linking Git to GitHub
Section titled “Linking Git to GitHub”In the settings menu of your GitHub account, go to Developer Settings->Personal Access Tokens->Tokens(classic).
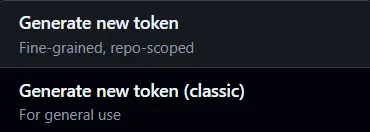
You should see an option to generate a new token.
Click on it and select Generate New Token (classic)
You will be prompted for a password, and then will see this screen:
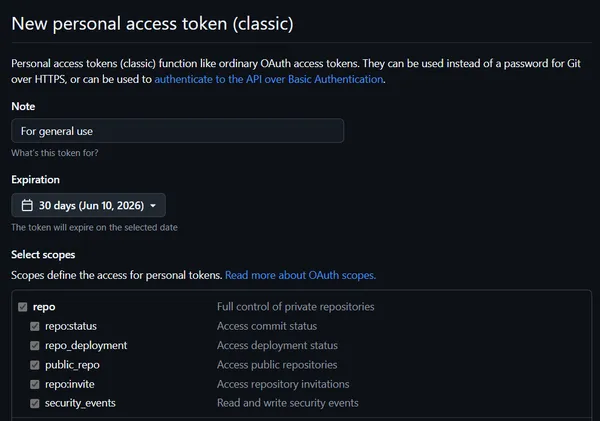
Generally, it is best to select only the scopes, or permissions, that you need and are going to use when generating your Personal Access Token (PAT). However, that is beyond the scope of this guide, so for now select all of the scopes (you can change this later), or read about scopes more here.
Once you have selected your scopes, scroll down to the bottom and click Generate Token. Once it is generated, copy it, because it will only be shown to you once.
To safely load our credentials, we use the Github Credential Manager (or this link for Github’s guide to the GCM).
To install the GCM on Linux, we can use the script provided by the GCM repo. You will prompted for your password.
curl -L https://aka.ms/gcm/linux-install-source.sh | shgit-credential-manager configureThe GCM by default doesn’t save our credentials to disk, so to store them securely (encrypted), we can set the store to use GPG encryption.
git config --global credential.credentialStore gpgUsing GPG as the store, however, requires some additional setup. We need to use the pass utility, which in turns requires a GPG keypair.
# generate GPG keypair gpg --gen-keyFollow the prompts, and make sure to remember the password you set. The final ouput should be something like this:
public and secret key created and signed.
pub ed25519 yyyy-mm-dd    <GPG-ID>uid         Your-name <Your Email>sub cv25519 yyy-mm-dd
Then, generate your stored passkey using the GPG-ID outputted.
pass init <GPG-ID> # you will be prompted for your password.By default, the GCM with GPG only caches your credentials for a period of 10 minutes, so increase this to 2 hours, find or create the file ~/.gnupg/gpg-agent.conf and add:
default-cache-ttl 7200max-cache-ttl 7200allow-loopback-pinentryOn Windows, the GCM comes bundled with Git Bash, which we installed earlier. It will be preconfigured to use the Windows Credential Manager. Should you have a need to reset it to this default, you can do as such:
git-credential-manager --global credential.credentialStore wincredmanNow that the GCM is configured, the next time you do a Git action that requires authentication, such as pushing to a repo on GitHub, you will be prompted for your PAT and accompanying password. The credentials will be stored, and the only thing you will have to do is periodically re-enter your password.
Using Git
Section titled “Using Git”To start, open your projects folder. If you do not have one, it is generally good practice to put it in /home/<user>/Documents/projects.
Open the terminal, then navigate to the project folder
mkdir /home/<user>/Documents/projects # if you do not yet have a projects folder cd /home/<user>/Documents/projects # navigate to the projects folderTo start, open your projects folder. If you do not have one, it is generally good practice to put it in C:\Users\<user>\Documents.
Open Git Bash, then navigate to the project folder
mkdir C:/Users/<user>/Documents/projects # if you do not yet have a projects folder cd C:/Users/<user>/Documents/projects # navigate to the projects folderFrom there, clone the repository
git clone https://github.com/<your-username>/hello-repo.git
# this will create a subfolder within your projects folder, so you can navigate as suchcd ./hello-repo
Committing
Section titled “Committing”Committing in Git is the act of saving a snapshot of the changes of a project since the previous save.
# this will stage all changes into the commit, which may not always be wantedgit commit -aUpon entering this command, Git will enter your terminal session into a text editor such as nano or vi.
It will prompt you to enter in a commit message, after which you need to exit the text editor and save the buffer.
Some common methods of saving exiting the text editors are:
| Nano | type Ctrl-x then Y |
| Vi | type :w then :qa |
| Notepad | Save then exit in top right |
Staging
Section titled “Staging”Comitting, however, does nothing on its own. First, you need to stage files.
You can think of your GitHub repo as three distinct areas. First you have your working directory, where the moment-to-moment changes you make live. Next is the staging area, where you can pick and choose files to prepare for commit. Finally, we have the repo itself, which keeps tracks of commits, which are bundles of staged changes.
To stage files, you can use the git’s add command.
git add /path/to/file.py
# or to add all unstaged filesgit add .
You can see the current staging status of your project as such:
git statusTo restore a file to the state of the last commit, you can use the restore command.
git restore /path/to/file.py
# to restore all filesgit restore .
.gitignore
Section titled “.gitignore”If you want to never track or commit a file, keeping it out of a repo, create a file called .gitignore in the top-level directory of your project. On each new line, enter the file pattern which you do not want to track. For example, if you didn’t want to commit build files in build/, or didn’t want to commit your .env file, or didn’t want any json file:
.gitignore
build/.env*.jsonRemote Origin
Section titled “Remote Origin”All of the commits you have done so far have been on your local copy of the repository. You can fetch the latest Git details (such as latest commit on the remote repo) as such:
git fetch originBefore doing any major git operation, such as pushing, pulling commits, and merging, creating, or deleting branches, it is good practice to fetch from origin.
You can update your local copy with the latest changes by pulling from the repo
# `origin` refers to the remote repo hosted by GitHub # `main` refers to the fact that the main branch on your local repo is set up to track the main branch on the remote repo. git pull origin/mainYou can update the remote host with your changes by pushing to the repo.
git push origin/mainBranches
Section titled “Branches”According to the Git website, branching is the act of diverging from the main line of development to continue to do work without messing with the main line.
In practice, this means that a branch is effectively a copy of a snapshot of another branch at a specific point in time, on which you can commit, push, pull, and do all of the regular Git operations on. This allows multiple different features to be developed independently of each other, and merged when they are ready, as well as enabling CI/CD pipelines.
Creating Branches
Section titled “Creating Branches”For our purposes, we can create branches in two ways: using the GitHub remote repo, or purely on the command line.
First, go to the home page of your GitHub repository, then click on the icon which says <num> branches.

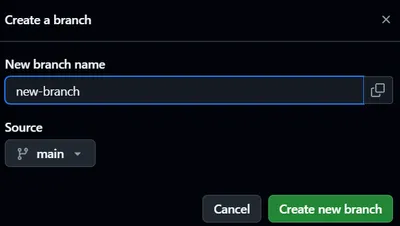
This will take you to the branches page, where you can create a branch by clicking on the green button in the top right labeled create new branch. A submenu will pop up asking your for a name for the new branch
Now that the new branch is created it only exists on the remote repo, so use Git’s checkout command to set up a local version of the branch,
git fetch origingit checkout new-branchSimilarily, after a branch is deleted on GitHub, you can delete it locally do as such:
git fetch origin --prune # prune fixes the remote pointers stored in git locallygit branch -D new-branchTo create and switch to a new branch from the terminal, we can use Git’s branch and checkout commands.
# replace `new-branch` with the name of your branchgit branch new-branchgit checkout new-branchThis branch currently only exists on our machine, which can sometimes be useful. To publish it to the remote repo, we can push to origin with the -u flag to set upstream data. Be careful to not overwrite a branch tracked with the same name on the remote repo.
git push -u origin new-branchgit fetch origin # To get new remote statusSimilarily, to delete a branch on the local repo and remote repo, you can do as such:
git push -u origin --delete new-branch # delete on remotegit fetch origin --prune # delete remote pointer locallygit branch -D new-branch # delete local branchMerging Branches
Section titled “Merging Branches”Having different branches isn’t much use if they stay separate forever. To solve this issue, we can merge branches together.
For example, if we want to merge a branch new-branch into the branch main, we would do as such:
# switch to main branchgit checkout main
# merge new-branch into maingit merge new-branch
While this merges the changes from new-branch into main, new-branch still exists. There can often be use in leaving the branch alive, however for our purposes we can go ahead and delete this.
Merge Conflicts
Section titled “Merge Conflicts”When trying to merge a branch, you may see a message that there are conflicts which have prevented the merge, and a list of files which contain conflicts. This is a merge conflict. Merge conflicts occur when the changes in one branch conflict with the changes in another branch since the branches diverged.
To resolve the merge conflict, open the file with the merge conflict in your favourite text editor, such as VSCode, nano, vim, etc.
Conflicts are marked with these markers: <<<<<<<, =======, and >>>>>>>.
This code is from<<<<<<< HEADThe branch recieving the merge=======The branch being merged>>>>>>> new-branchDelete the conflict markers and make the changes you want in the final merge. Once this is done for all files, stage your changes and create a commit to resolve the merge conflicts.